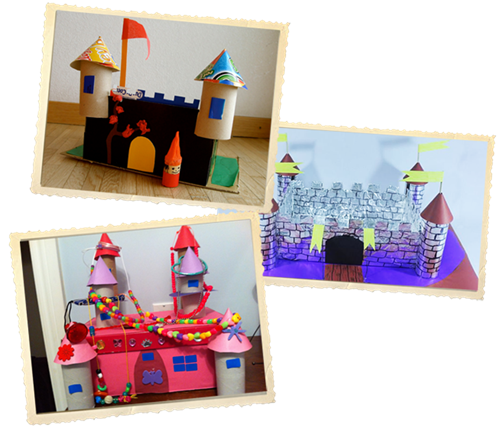
Ice Castle
So you wanna build an Ice Castle? Here are instructions for a SMALL CASTLE! Purchase the full version of Icicle Camp to get the LARGE VERSION TOO. Design of castles are only limited by your campers' imagination!

SUPPLIES:
Per child: 1 shoe box, tissue box, or cereal boxes
Several rolls Tin foil, Tempera paint, paint brushes, Paper Towel Rolls/Toilet Paper Rolls, Pipe cleaners, Colored constuction paper, Magic Markers, glue, scissors, pencils, costume jewlery, gems, stickers, tape.
NOTE: You may want to do this craft over two or three days depending on the age of your campers and their attention span. In addition, "towers" will need to dry after glued to the boxes.
STEP 1: Decide on what kind of castle you want. Will it be with the cover face down (as in the pink castle above?) or with the top off (so you can cut rivets)
STEP 2: Once that is decided for each child, distribute paper towel or toilet paper rolls. (4 per child)
STEP 3: Doors and windows: If you are going to paint the boxes, paint first, have child draw windows and doors, and help the childen cut them out. If you are going to use construction paper or tin foil to cover the boxes, cover the boxes first, and then either draw windows and doors, or use contruction paper/stickers to create windows and doors.
STEP 4: Cover "towers" with either tin foil, paint, or construction paper. Glue towers (paper towel rolls) to 4 corners of the boxes as shown in photos above.
STEP 5: Cut 6 inch circles out of contruction paper and form cone. Add to towers.
Continue decorating the castle with fake jewels, stickers, markers or any way your camper can dream up! Enjoy your castle!
Does your camp want to build a kid sized castle that every one can play in? Purchase the FULL VERSION of Icicle camp to find out how!
Full Camp Version: $125

Icicle Camp: $75


